Updates, Malware Analysis Links, Meltdown, & Spectre

Readers,

My apologies for not posting more often. I’ve been busy with my studies (and occasionally reading and writing off-site). There’s been so many new forensics blogs, mailing lists, and infosec communities recently that I’ve been content with reading instead of writing my own posts. Bad habit, I know! I’ve also taken part in a number of security CTF and infosec challenges. I said that I’d be covering past challenges and their solutions in greater depth in my DC3 post and that’s still a plan for the future (if time permits).

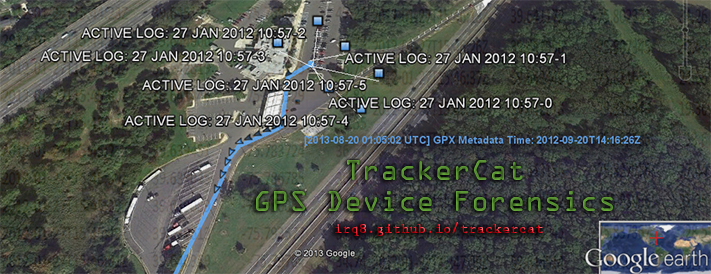
I’ve also been toying with the idea of setting up an up-to-date CTF challenge section on site since I have enough content from past CTFs and challenge organizers. We’ll see. I did make a challenge to de-anonymize target onion sites, the solution to which would be in discoverable data about the target web server. But I’ve been told that this might come across as hostile and not helpful for learning purposes, so I’ll probably just end up with standard jeopardy-style questions. Other options include the obligatory stegano in images, sound files, whole forensic images of disks with flags for various forensic artifacts, etc. Since security challenges are time consuming to create, it’ll have to wait a little longer. As always, feel free to subscribe to the blog for future updates.

I’ve also been looking for quality reverse engineering malware resources. I’m still new to that arena but what follows is a list of some really helpful sites, webinars, and books for learning to disassemble programs and study malware both from a static and dynamic perspective. I realize many readers here already do malware analysis, but this is intended for others looking to get into it. Some of the sources are older but all of them are worth checking out. Regretfully I can’t go through every examiner’s quality blog here, but check the site for more links! I’m also happy to read, study, and add any sites or research if submitted.

Malware Resources

Blogs, Articles, Webcasts, & General Papers

Introduction to Malware Analysis by Lenny Zeltser (Webcast), 12/6/2016.
Note – Webcasts, webinars, white papers, blog entries, conferences, I’ve seen a lot of Lenny Zeltser’s work and I’m a big follower. So I often link to his work.

Malware Analysis: An Introduction (GIAC Gold Paper) by Distler. 12/14/2007.

5 Steps to Building a Malware Analysis Toolkit Using Free Tools by Lenny Zeltser. 3/14/2015.

Malware Analysis Essentials Using REMnux w/ Lenny Zeltser (Webcast), SANS Institute, 4/17/2014.

4 Cheet Sheets for Malware Analysis by Lenny Zeltser, SANS Blog, 9/13/2017.

Analyzing Malicious Documents Cheat Sheet by Lenny Zeltser. 9/7/2017.

Thoughts on Malware, Digital Forensics, and Data Breaches by Hal Pomeranz, SANS Blog, 1/18/2012.

CyberBit’s 5 Open Source Malware Tools You Should Have in Your Arsenal

Projects To Watch/Tools to Know:

FLARE VM – The Windows malware platform by FireEye, a company known for their malware analysis and incident response know-how. 1/16/2018 Update: This tool is really outstanding. The packages can be imported into any VM, preferably newly rolled evaluation copies of Windows 10 VM, since you can just keep restoring back if you max the 90 day eval. Flare includes many tools for file analysis out-of-the-box such as hex editors, debuggers, disassemblers, text editors, PE tools, process hacks, packet analyzers, alternate data stream manipulation tools, and more (official list on Github). Package installation is made simple with Chocolatey. My own custom box includes essentials I downloaded such as OWASP ZSC for Python shellcode generation, Yara, stegano detection tools, audio editors, and more. Definitely not an exaggeration to say that you can make this into the best security platform available on Windows.

REMnux – A Linux Toolkit for Reverse-Engineering and Analyzing Malware

Kali Linux – I use Kali a lot so I highly recommend it. It’s an extremely well maintained distro, adding your own packages as needed is simple and usually everything just works (thanks to all the modules and dependencies pre-rolled into Kali). There are some great tutorials for pentesting and forensics on Udemy and through Offensive Security. Adding malware tools is easy.

SIFT Workstation – I’ve used multiple versions of SIFT from Linux to Windows 7 and 10. I highly recommend it for forensics work. It does have more timeline tools than Kali (although you can add packages to Kali as you see fit). SIFT VM + Kali VM = ideal. I have heard great things about BlackArch for penetration testing but have yet to try it (I do have fond memories of Archlinux and Archbang, so it’s on my to-do list).

Yara Analysis Tool – industry leading tool in signature and behavioral rule-set matching for malware.

Cuckoo Sandbox – Sandboxing tool for malware. If you’re just using VMware, be careful of VM escape vulnerabilities, bogging down resources, etc.

IDA & IDA Pro – Ideal for static analysis. Disassembler for every major operating system. I’ll be honest, my assembly skills are weak, but this is one tool worth sticking with. There’s even a great No Starch book on IDA to help you out! (IDA Pro Book, 2nd Edition by Chris Eagle — fair warning, the assembly sections are pretty light and assume you know what you’re doing, so I’d suggest supplementing it with another resource to familiarize yourself with the subject prior to diving into IDA. One good (and free) course is the x86 class by Open Security.)

OllyDbg – The Gray Hat Hacking books use OllyDbg a lot.

Immunity Debugger

Automatic Malware Analysis and Sandbox Services by Lenny Zeltser

Classes:

Introductory Intel x86: Architecture, Assembly, Applications, & Alliteration w/ Xeno Kovah (Open Security Training)

Introduction To Reverse Engineering Software by Matt Briggs & Frank Poz (Open Security Training)

Reverse Engineering Malware by Matt Brigs & Frank Poz (Open Security Training)

FOR610: Reverse-Engineering Malware: Malware Analysis Tools and Techniques with Jake Williams (SANS Institute)
Note- I haven’t had a chance to take this class but it’s pretty much the de-facto malware analysis class in digital forensics.

Again, there are many courses and tutorials available through Lynda, Udemy, and YouTube. Here… hold up. There we go (had to do it!).

Technical References:

Tech refs can be expensive but these are totally worth it if you’re committed to learning the subject matter (or, like me, you’re equally committed to making a visually impressive security bookshelf /modestyfail). Most well-maintained, high traffic libraries should have some of them. Sure, there are plenty of online sources with similar information but these texts are definitely helpful.

Malware Analyst’s Cookbook: Tools and Techniques for Fighting Malicious Code by Hartstein, Richard, Ligh, and Adair. 2010.
Note: It’s the bible of malware analysis. It was one of the first larger-works to tackle malware head-on. While it isn’t as technically in-depth for complicated tasks (I found that GHH was more technical for some things), it’s a must have. New to malware analysis, I can honestly say it’s readable and worth checking out.

Black Hat Python: Python Programming for Hackers and Pentesters by Justin Seitz. 2015.
Note: One of my all time favorites. Black Hat-style techniques are explored using Python code and popular modules. There’s something for everyone here. (I often use BHP or GHH – mentioned below – as a springboard for Python projects, so I can also recommend getting physical copies as opposed to eBook versions.)

Gray Hat Hacking, 2nd Edition & 3rd Edition by Harper, Harris, Ness, Eagle, Lenkey, Williams. 2008 & 2011 respectively.
Note: When I first picked up the 2nd edition from the library I had no idea what IDA Pro was and wanted more on pentesting. Immediately dismissing GHH something I wouldn’t use. In retrospect, GHH is an awesome guide to DLLs, handles, processes, reverse engineering, and malware analysis.

Data Hiding Techniques in Windows OS: A Practical Approach to Investigation and Defense by Hassan & Hijazi. 2017.
Note: This book should just be called “How to Win at CTF Every Time.” While it doesn’t explore malware in-depth, it does talk about various forms of data hiding and data manipulation (ADSs, stegano, etc). Since malware utilizes different methods of remaining hidden, DHTIWO is a great guide for developing critical thinking skills. This and File System Forensic Analysis by Brian Carrier are so easy to use as regular resources in forensics.

Violent Python: A Cookbook for Hackers, Forensic Analysts, Penetration Testers & Security Engineers. TJ. O’Connor. 2013.
Note: I used to really love this book prior to finding BHP and the Gray Hat books. It has drone hacking and Twitter OSINT hacks, what’s not to love? The code is hit or miss but it has some good ideas for Python coders. It does also contain a section on Virus detection. I prefer Justin Seitz’s work, but respectful nod to TJO’s great resource.

Miscellaneous Resources:

Mitre’s CVE Page (Security Bug/Exploit Lookup)
Yara Official Documentation
Yara Definitions & Rulesets
Offensive Security’s Exploit-DB (Exploit Lookup & Sample Code)

Also check the links to other blogs around the site as there are a fair amount that cover malware research.

Meltdown & Spectre Links

Meltdown Paper | Spectre Paper | FAQs: https://meltdownattack.com/#faq-fix

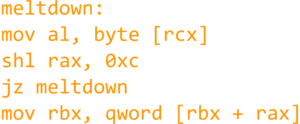
You know that feeling when you’re lurking darknet forums or Inj3ct0r for information on new malware and you’re like, “what a liar, that’s not a revolutionary 0day exploit, that’s yet another buffer overflow exploit!” This is a fair bit more serious.

Thanks to Jann Horn and the analysts at Google Project Zero, two new dangerous exploits were discovered. Spectre – which leverages a processor’s speculative execution to pull data from memory to an attacker via side channels* – and Meltdown – which uses out-of-order code execution on processors to leak sensitive information across any form of virtualized environment or through any form of protected memory space. Unfortunately, fears are that they’re so deeply embedded in modern processor architecture that they’re nearly impossible to temporarily patch without crippling current infrastructure. They aren’t entirely software issues that can be patched easily. Dynamic execution speeds up computing performance drastically while Spectre potentially effects so many different types of processors. I’ve tried to include some useful links here for understanding the severity of Meltdown and Spectre.

* Yes, Spectre sounds like the coolest thing since poptarts. So much for professionalism.

FireEye Notice for CVE-2017-5754, CVE-2017-5753, and CVE-2017-5715 (FireEye), 1/5/2018.

Researchers Discover Two Major Flaws in the World’s Computers by Cade Metz and Nicole Perlroth (New York Times), 1/3/2018.

The Complete List Of CPUs Affected By Meltdown / Spectre by Dr. Adrian Wong, 1/8/2018.

In response to worries of Spectre being able to extract passwords from application password managers and vaults, Dashlane’s Eitan Katz wrote an article on the state of Dashlane and what Meltdown and Spectre do. Check it out here: Meltdown and Spectre: What you Need to Know to Stay Safe by Eitan Katz (Dashlane), 1/5/2018.

It’s not every day you see patches that cause entire Linux communities to freak out. If you’re an Ubuntu user, be sure to check out this article regarding Ubuntu 16.04’s patch: Meltdown & Spectre Patches Causing Boot Issues for Ubuntu 16.04 Computers by Catalin Cimpanu, 1/10/2018. The patch in question only applied to Meltdown. The problem was fixed with subsequent updates after the article was released.

Be sure to check out the CVEs below for more technical information about each of the exploits. The links contain a lot of critical information such as sample source code that you can attempt to run in a virtual environment. Note that your mileage may vary in VMs, some have reported BSoDs and not useful crashes when attempting to execute the exploits.

Spectre CVEs: https://cve.mitre.org/cgi-bin/cvename.cgi?name=CVE-2017-5753 & https://cve.mitre.org/cgi-bin/cvename.cgi?name=CVE-2017-5715
Meltdown CVE: https://cve.mitre.org/cgi-bin/cvename.cgi?name=CVE-2017-5754

DC3 Challenge & VSC Analysis on Linux

I recently had to analyze a Windows 7 system’s Volume Shadow Copies (VSCs) that were stored on a Virtual Machine Disk (VMDK) as part of an advanced-level DC3 challenge exercise.  While there are a few great resources out there regarding forensics and VSCs, most of these methods use Windows workstations or commercial tools for conducting an examination.

More often than not I’ve found the aforementioned methods limiting, their success either hit-or-miss. I’ve been looking for open source alternatives for VSC analysis that work on my Linux workstations.

While reading the Malware Analyst’s Cookbook section entitled “[w]orking With Virtualbox Disk and Memory Images,” I decided to convert the VMDK the DC3 provided to VHD using VBoxManage. Harlan Carvey’s post entitled, “How to Mount and Access VSCs” also helped me understand VHDs and how they were used in forensics. But for some reason I couldn’t mount my VHD properly in Windows using his approach. After re-converting the VHD to every major image file type, I decided to go with a libvshadow approach that tackled both the VMDK conversion and provided the ability to analyze the evidence on my Ubuntu box.

Knowing I needed to convert the VMDK provided into some kind of usable format, I set out to find the best guide to mounting VSCs. EpyxForensics has a terrific guide to this entitled,“Mounting Shadow Volumes in Linux Ubuntu 12.04” (see “Resources” below).

Using the EpyxForensics approach, I was able to both mount the virtual disk and extract the data I needed in a fast and efficient way. I’ve tweaked some of those methods below to suit my needs for the challenge and I’m more than pleased with the results. Although you – the reader –may not be using VMDKs, using libvshadow to analyze VSCs is extremely beneficial and worth trying.

What follows is my experiences with the 2013 DC3 Forensics Challenge as well as my methodology on the Volume Shadow Copy exercise.

Why Shadow Copy Analysis?

Without re-quoting every single resource on the topic I’ve read, VSCs provide a great way for examiners to see a system up to the time of a snapshot. This snapshot is a sort of time machine that can be crucial in understanding the intricacies of user activity on the system.

Volume Shadow Copy analysis is also an interesting avenue if other anti-forensics techniques were used. Smart criminals can cover their tracks by wiping Prefetch, using encryption, scripting tools to sanitize registry keys, use timestomp to control timestamping, perform drive wipes, tamper with MFT records or other anti-forensics measures.

Snapshot and backup examination techniques are often left out by forensics suites. All too often developers of such suites are left playing “catch up” when adding new features to their tools. But criminals are people too; sometimes the convenience of having a backup outweighs the desire to hide data. Enter VSCs.

An example could be a snapshot that was created after the installation of a new program. The user may not be aware that VSC is being created to begin with. Once created, the snapshot may contain unencrypted copies of files that were later encrypted. Other artifacts important to your case may also reside within copies.

It goes without saying that I found this DC3 VSC to be extremely rewarding. While I can’t give actual exercise questions or case files, I’ve tried to outline the steps I used below.

Installing VBoxManage & Sleuthkit 4.0.2

On Ubuntu I was able to install the required tools automatically with APT:

For Sleuthkit you can: sudo apt-get install sleuthkit

For VBoxManage you’ll need Oracle VM Virtualbox:

sudo apt-get install virtualbox

Linux: VMDK to RAW

To convert a VMDK to a RAW/dd image you can:

VBoxManage clonehd vdisk.vmdk newvdisk.dd –format RAW

The percent status of the conversion will keep you informed as to the status of the conversion.

Windows: VMDK to RAW (QEMU)

The alternative to the linux method in Windows is to use the QEMU Windows Binaries. Due to a lot of misinformation on the subject, I’ve included the method used for performing the conversion on Windows below.

With QEMU installed on Windows, navigate to your QEMU folder (or if you have it in path), open a cmd shell. We can use qemu-image to convert the VMDK to the desired format:

qemu-img convert -f vmdk shadows.vmdk shadows.raw

Determining Offset of Partition

Calculating an offset is fairly straightforward if you’ve used linux for forensics in the past. First see the partitions and their starting locations with:

mmls newvdisk.dd

Multiply the starting point with the sector size (usually 512, mmls reports this when you run the command). The resulting number will be what we use to target the NTFS partition on the image. This is important if the image represents a physical whole disk or multi-partitioned system. In my case, it simply represented one partition on which resided the critical files. My working offset was 65536, the subsequent mount would look like:

sudo mount -t ntfs -o ro,offset=65536 shadows.dd /mnt/evidence

Take a peek inside with:

cd /mnt/evidence/System\ Volume\ Information/; ls -la

For those that don’t know the format of VSCs, check the MSDN article here. We see the identifying GUID and unique set IDs.  This is a great way of gauging where to focus your efforts.

libvshadow by Joachim Metz is an excellent tool for conducting a deeper analysis of shadow copies. We’ll set up the tool’s requirements and set it up from its latest source below.

libvshadow

Install the requirements:

sudo apt-get install libfuse-dev

Install libvshadow’s latest source and unpack it, configure and make install.

To get basic information about the VSCs, we can use vshadowinfo with the following syntax:

vshadowinfo -o [offset] [image]

The order of shadows listed is also neat. The top store will be the furthest back in time while the latest would be the last (kind of self-explanatory but you probably know that I enjoy being long winded online). The listing also helped me answer a number of temporal questions in the exercise. This information can correspond with your case’s timeline so examining the output is critical.

The output looks like:

vshadowinfo 20131003
Volume Shadow Snapshot information:
Number of stores:           4

Store: 1

Identifier                        : e132d30a-9cee-11e0-a94f-000c29caa4ff
Shadow copy set ID        : f24f1ec4-e556-473f-b8dd-3417944d613d
Creation time                 : Jun 22, 2011 17:26:18.953125000 UTC
Shadow copy ID             : 4db4b198-10bf-412a-8168-82aab3ad66e5
Volume size                   : 2144337920 bytes
Attribute flags                : 0x0042000d

Store: 2

Identifier                        : e132d310-9cee-11e0-a94f-000c29caa4ff
Shadow copy set ID        : 7d330a7f-eaaa-47e6-a7ae-ec586cb60705
Creation time                 : Jun 22, 2011 18:11:35.484375000 UTC
Shadow copy ID             : a3de8297-e174-4cc6-af1e-14b97b228b91
Volume size                   : 2144337920 bytes
Attribute flags                : 0x0042000d

Store: 3

Identifier                       : e132d31d-9cee-11e0-a94f-000c29caa4ff
Shadow copy set ID       : ca46eac5-70eb-4c53-a21a-b6a6b66ba245
Creation time                : Jun 22, 2011 18:15:52.140625000 UTC
Shadow copy ID            : 94d3e514-62db-4dd2-89e1-7ff3810bb861
Volume size                  : 2144337920 bytes
Attribute flags               : 0x0042000d

Store: 4

Identifier                     : e132d322-9cee-11e0-a94f-000c29caa4ff
Shadow copy set ID      : 31f43d93-881f-43b2-bd40-86133cba47d7
Creation time               : Jun 22, 2011 18:19:45.484375000 UTC
Shadow copy ID           : 2740b68b-cdb2-4c13-a535-f2f6f1ecb352
Volume size                 : 2144337920 bytes
Attribute flags              : 0x0042000d

But what if you need access to the actual data within the shadow copy? The EpyxForensics post told me about a great utility in libvshadow, vshadowmount. This awesome feature allows you to select which VSCs to mount with traditional linux mountings. It does this by allowing you to mount the partition by offset on the image and mount each store individually (the latter is the amazing part).

sudo vshadowmount -o 65536 shadows.dd /mnt/vssvolume

To mount each store individually (if you know what time frame you are working with), you can:

sudo mkdir /mnt/vss1; sudo mount -o ro /mnt/vssvolume/vss1 /mnt/vss1

There were 4 VSCs to mount in the exercise (as seen in /mnt/vssvolume). To mount them you could also create a bash or Python script to do it for you automatically. I ran the commands by hand for each store. Tedious but I like having control over what’s going on. The not-so-simplified version looks like this:

sudo mkdir /mnt/vss1; mkdir /mnt/vss2; mkdir /mnt/vss3; mkdir /mnt/vss3; mkdir /mnt/vss4; sudo mount -o ro /mnt/vssvolume/vss1 /mnt/vss1; sudo mount -o ro /mnt/vssvolume/vss2 /mnt/vss2; sudo mount -o ro /mnt/vssvolume/vss3 /mnt/vss3; sudo mount -o ro /mnt/vssvolume/vss4 /mnt/vss4

If you want to find a particular file that’s pertinent to your case, you can do that with the find command (find -name [file]*). You can also view the shadow copies from your desktop environment’s built in file manager as you can with any mounted device in Linux (this helps with viewing thumbnails of JPGs captured in the shadow copy).

Another good find trick is to use the –mtime [day] option to find files that were modified after a certain amount of days in the past. Or use your favorite regular expression against the mounting to find specific pieces of information.

Since the primary questions dealt with timestamps I set up Phil Harvey’s ExifTool and ran it against the desired files within the copies. Obviously you can also use this tool to acquire metadata timestamps residing within the file’s themselves (such is the case with artifacts like LNK files).

Shadow Explorer

The only tool I really don’t like using is Shadow Explorer for Windows. It may be a fine tool for general VSC work but I don’t see it as useful in forensics. This is a personal opinion and I know many great examiners that use it regularly. I certainly mean no disrespect to the tool’s author.  I’d try it if you are limited to working on a Windows forensics workstation but much prefer using a Linux-oriented approach.

My main reason for disliking Shadow Explorer is that it doesn’t seem to work with virtual mountings (FTKi mountings set physical or logical, ImDisk, Winmount, etc). The author recommends enabling system protection on devices so that they appear in Shadow Explorer but this isn’t an option for as I’m concerned.

Closing Remarks

The solution above worked for me and fulfilled my needs on the challenge but this approach isn’t the only approach. I’ve created a list of VSC references below in hopes of helping others find a solution they’re comfortable with. Feel free to submit your own site or article by emailing me at adam [at] forensicsblog.org — I’ll add it to the list.

Lastly I should note that the methods I’ve described above are not new or Earth shattering, libvshadow is used by other examiners. It’s simply new to me, now it’s also my method of choice.

DC3 Challenge Exercises Completed

The forensics challenge was hosted by the DoD Cyber Crime Center (DC3) and was a terrific experience for me considering I’m relatively new to forensics (the challenges are similar to online jeopardy style CTF). While there will be other challenges, this will likely be the DC3’s last. This is really unfortunate news: nothing reinforces infosec skills like challenges and competitions. I have yet to see a forensics-specific competition that has as much scope and depth as the DC3 Forensics Challenge.

I got into the challenge during its last month by running solo and without a boost from the missed bonus rounds. Despite these set backs, I did manage to get in the Grand Champion category with pretty good standing in both the Overall Civilian and the U.S. Overall categories. I’m proud of this, I did much better than I thought I would. While it doesn’t make me an authority on digital forensics (I’m not), I’d be glad to write about other exercises attempted.

Special thanks to the DoD Cybercrime Center (DC3) and the Air Force Office of Special Investigations (AFOSI) for hosting such a cool event for civilians and military personnel alike. I’m in no way affiliated with and/or endorsed by AFOSI or DC3.

Resources

There’re a lot of good resources out there regarding Volume Shadow Copies.  Many of which are written for examiners by examiners. Anyone interested in VSS or VSC analysis should definitely check them out:

Mounting Shadow Volumes in Linux Ubuntu 12.04” by EpyxForensics.

Ripping Volume Shadow Copies – Introduction,” Journey Into Incident Response (blog) by Corey Harrell – note: his entire VSC series is really terrific.

Shadow Timelines and Other VolumeShadowCopy Digital Forensics Techniques with Sleuthkit on Windows,” SANS Computer Forensics Blog by Rob Lee

Accessing Volume Shadow Copies,” by Harlan Carvey

Mount shadow volumes on disk images,” forensicswiki.org (site lists various methods)

Into the Shadows,” forensic4cast, by Lee Whitfield

libvshadow’s Project Page: http://code.google.com/p/libvshadow/

How Volume Shadow Copy Service Works,” TechNet (Microsoft)

Volume Shadow Copy Service,” MSDN on VSS and how it works

Volume Shadow Copy System Restore” (VSS FAQs) by Tomasz P. Szynalski

Volume Shadow Copy Forensics.. cannot see the wood for the trees?” by Richard Drinkwater, FFTSF blog

Examining Volume Shadow Copies – The Easy Way!” by Simon Key, Digital Forensics Today (EnCase/Guidance Software) – note: this piece is very interesting and helps explain what’s going on behind the scenes when snapshots are taken. It also discusses the EnCase PDE approach to analyzing them.

Sample Code – Dictionary Zip Password Tool

After reading Violent Python, I decided to try making a basic dictionary zip password recovery tool for fun. Some of the other free open source tools out there are great but this tool is fully functional if not ideal. I’m primarily posting it to serve as an example of how Python can be used to perform such an attack. I do not condone the use of password crackers for illicit purposes.

The tool can generate a biographical dictionary from a specified file’s ASCII strings as well as populate the dictionary with a recursive directory listing from the location of your choice. Got the idea while studying for my AccessData cert. Their Password Recovery Toolkit does this in hopes of increasing the likelihood that the dictionary will contain a relevant password. The idea is that a user either used the word in the past or that it can be found elsewhere on his or her computer. A very cool idea that’s helped me on forensics challenges in the past.

I’ve designed the code below for Python 2.7.5 on Windows 7. It uses the Strings binary from Picnix Utils. You can also click here to download a copy. Obviously the best defense against it is to use a strong password outside the scope of the dictionary (which most people do when protecting zip files anyway).

import argparse
import zipfile
import subprocess
import os

print ''' SYNTAX:
    Dictionary: zipdict.py -f (zip) -d (dict)
    Bio Dictionary Generator: zipdict.py -f (zip) -s (file with desired strings)
'''

parser = argparse.ArgumentParser(description='Zip file dictionary attack tool.')
parser.add_argument('-f', help='Specifies input file (ZIP)', required=True)
parser.add_argument('-d', help='Specifies the dictionary.', required=False)
parser.add_argument('-s', help='Build ASCII strings dictionary.', required=False)
args = parser.parse_args()
zipfile = zipfile.ZipFile(args.f)

print '{*} Cracking: %s' % args.f
print '{*} Dictionary: %s' % args.d

def biodictattack():
  print '{*} Generating biographical dictionary...'
  stringsdict = open('stringsdict', 'w')
  stringsout = subprocess.Popen(['strings', args.f], stdout=subprocess.PIPE, stderr=subprocess.STDOUT)
  for string in stringsout.stdout:
    stringsdict.write(string)
    stringsout.wait()
  walkpath = raw_input("Directory listing starting where? [ex. C:\] ")
  for root, dirs, files in os.walk(walkpath):
    for name in files:
      filenames = os.path.join(name)
      stringsdict.write(filenames + '\n')
  for root, dirs, files in os.walk(walkpath):
    for name in dirs:
      dirlisting = os.path.join(name)
      stringsdict.write(dirlisting + '\n')
  print '{*} Done. Re-run tool with zipdict.py -f (zip) -d stringsdict'

def dictattack():
  dict = open(args.d, 'r')
  with open(args.d, 'r') as dict:
    for x in dict.readlines():
      dictword = x.strip('\n')
      try:
        zipfile.extractall(pwd=dictword)
        print '{*} Password found = ' + dictword + '\n'
        print '{*} File contents extracted to zipdict path.'
        exit(0)
      except Exception, e:
        pass

if args.s:
  biodictattack()
else:
  dictattack()

My next post will be on analyzing Volume Shadow Copies on Linux and some cool methods that I used on the 2013 DC3 Forensic Challenge.

Top Articles & WordPress Session Hijacking

The blog has successfully been migrated to the new self-hosted WordPress (forensicsblog.org), simple name, same great flavor! We’ve got a double feature for you this evening. First, is a list of some of the articles generating the most views on here (thank you for reading!), followed by some WordPress Session Hijacking resources.

Also, please take the time to visit some of the great forensics resources along the right side of the blog. I’ve tried to keep the list to (in my mind) the most interesting blogs/bloggers in information security. They all have great content and research worth reading.

Top Articles on fork()

  • Research: GPS Device Analysis” — research on the manual forensic examination of a Garmin Nüvi 1490. Piece includes a comprehensive breakdown of the GPX file structure, how it’s used to store trackpoint data and information on GPS metadata.
  • Thoughts on viaExtract (Demo)” — discusses the viaExtract utility designed by viaForensics for the analysis of android devices. Highlights artifact extraction with AFLogical and viaExtract case reports. Also discusses the Santoku Linux distribution for mobile forensics.
  • Updates to GPS Utility (Timestamp Features)” — TrackerCat’s latest post to date: adds timestamp extraction of trackpoint data within GPX files to CSV file format. Also includes the ability to recursively export GPX files from a user-specified path and displays embedded file metadata time.

There are a lot more interesting posts here so be sure and scroll down or use the Monthly Archives menu on the side panel. You can also use the site-wide search for topics such as “encryption” or “OpenPGP.”

WordPress Session Hijacking

Since I’ve been tinkering with this blog, I’ve noticed that WordPress is still vulnerable to session cookie hijacking. This is a topic that WordPress or plugin developers should address in much greater detail since many use WP as a site-wide CMS. This section is to share some links on the subject and increase awareness of it.

To those that may not know, session hijacking is when an attacker copies authenticated session cookies from an authorized user and uses them as his own. This is done by first monitoring unencrypted network traffic and then modifying the appropriate cookie and sending it back to the server. HTTP or poorly implemented HTTPS are most at risk. There’s nothing new about this and it’s extremely simple to execute.

These sources can be invaluable for understanding and mitigating the risk:

There are too many MITM tools to list. I’ve included the Fern link to demonstrate how such attacks can be carried out over a wireless network. The following tools are for either modifying HTTP headers or crafting clone cookies:

Almost every new installation of WP.org I’ve seen is susceptible to this attack. WordPress recommends using HTTPS. If you don’t have SSL enabled on your site or haven’t set up HTTPS properly, your site could be at risk. Other forms of risk mitigation include:

  • Use a trustworthy VPN when logging into a WordPress to prevent eavesdropping. If using a mobile device or laptop to access your blog a VPN is the simplest way to ensure your safety on an public hotspot.
  • The Safer Cookies Plugin by Janis Elsts which restricts an IP address to one session at a time, solving half the problem for blog owners. It would have been nice to see this as an option in out-of-the-box WordPress. It’s almost ludicrous that WP doesn’t come with a feature like this (even Facebook allows for terminating multiple simultaneous sessions).
  • Deploy WP security suites and WP firewall plugins such as Cloudflare Threat Management, WordfenceBetter WP Security or Bulletproof Security. Firewalls don’t protect against session hijacking directly but helps by adding IP-based controls such as blacklisting and white listing single IPs or addresses within a specific range. They may slow down the site’s loading speed but they’re worth it.
  • WordPress login control plugins are extremely useful to setup on your blog. There’s Login Lockdown and Lockdown WP Admin. The first provides excellent rules for login expiration and maximum login attempts before an account is locked down. The second offers the ability to hide the WP admin page from individuals that aren’t logged in. It also has the option of making logins use basic HTTP authentication (but without SSL, that isn’t as secure as it sounds).
  • Sandboxing. If an attacker does gain a foothold by accessing an account, make sure it isn’t your admin account (if you’re using your WP admin account to log in regularly, you shouldn’t be doing it from an open wifi network beyond your control). Also make sure your account’s user directory and all files within it are safe (this is critical if you’re using WP plugins that allow you access to modify files without having to FTP/SFTP in).

WordPress has yet to come up with a fix for this type of attack as it’s considered “low priority.” This is probably due to the fact that this attack isn’t direct, it’s passive and requires being in a position to capture network data. The problem is that WordPress isn’t necessarily responsible; HTTP is not secure and website owners should be aware of this threat.

Hope you found the resources above interesting. Thanks for reading!

Updates to GPS Utility (Timestamp Features)

I decided to make some pretty solid changes to TrackerCat since my last post.  I wasn’t satisfied with it only converting GPX-to-KML. The new changes include the following:

  • Ability to recursively export all GPXs from a specified path (can be a mounted device image).
  • Extract and write all trackpoint timestamps to CSV  including archived files.  Optionally, you can choose to export Active Log names and times to its own CSV. While the latter isn’t as important to export as trackpoint times, it may still be useful to some.
  • Display a file’s metadata time tag during the timestamp dump. This is critical if the GPX file is the Current.gpx (akin to a last access, or rather, last power-on for some devices). These are not written to CSV as their importance differs depending on file and scenario.

To reduce spam, I’ll try to keep minor official updates to Twitter instead of posting here in the future . Hope the updates are useful!

newlogo

TrackerCat: GPX-to-KML Active Log Mapping Tool

To supplement my GPS research, I created a simple tool for the extraction of Active Log data from GPX files. This tool will transform GPS device data files into keyhole markup language files for easy mapping (GPX to KML). The output can easily be opened in programs like Google Earth. This tool will provide analysts with a better understanding of data contained within GPXs and their Active Logs. The KMLs are complete with timestamps and trackpoint coordinates.

Prior to TrackerCat – and without the use of expensive utilities – analysts had to manually re-save exported GPX files as KMLs in mapping programs. TrackerCat automates the transformation process while striving to preserve as much forensic data as possible.

While the tool is really just a simple XML-to-XML XSLT transform script (that parses the appropriate formats), you can join the the project to improve its functionality! You can use the project’s Github to show off your own GPS device forensics scripts. Also be sure to check out the PowerPoint here.

Official Github Logo

Click on the Official GitHub logo above for TrackerCat’s reader-friendly GitHub landing page, or go right to the project’s GitHub.

Metadata Extraction of GPX Files

To briefly supplement my GPS Device Analysis research, the GPX file itself should have interesting metadata qualities that can help you decide its relevance to your case. For example, I was able to pull the following data out of my GPX file using ExifTool by Phil Harvey:

Gpx Metadata Link Href : http://www.garmin.com
Gpx Metadata Link Text : Garmin International
Gpx Metadata Time : 2013:03:03 19:38:00Z
Gpx Trk Name : ACTIVE LOG: 03 MAR 2013 14:11
Gpx Trk Trkseg Trkpt Lat : 11.111111
Gpx Trk Trkseg Trkpt Lon : -11.111111
Gpx Trk Trkseg Trkpt Ele : 143.85
Gpx Trk Trkseg Trkpt Time : 2013:03:03 19:35:50Z
Gpx Trk Trkseg Trkpt Extensions Track Point Extension Speed: 8.24
Gpx Trk Trkseg Trkpt Extensions Track Point Extension Course: 292.24

This provides yet another quick way of determining whether the GPX’s last Active Log corresponds with your working timeline.

Research: GPS Device Analysis

After much work, I’ve released my research covering the analysis of a Garmin Nuvi 1490 GPS device.

There’s not a lot of accurate information out there on GPS forensics. What you typically find is that some sites have information on only a select number of GPS devices, and that information is extremely shallow at best. The other end of the equation is companies selling their services. Seeing the need for a clear, free and open forensic report, I conducted the research and published it on my site free of charge.

The goal of this paper is meant to aide in providing meaningful analysis for one of the most popular Garmin devices. This particular model was sold heavily through the U.S. wholesaler Costco a few years ago and has been a GPS of choice for many casual users since then. It also uses industry adopted GPX file standard to store Track data which is of significant importance to GPS forensics.

Such skills are absolutely essential whether you work for law enforcement, military or in the private sector. I hope that my small contribution can help. Expect more research papers in the future.

Please click here for the research paper: Research: GPS Device Analysis

Android USB Device Support

While reading Android Forensics by AH and setting up the SDK on my Ubuntu box, I noticed the udev rules needed an update. Makes sense considering there’s been many new vendors since the book was published.

I’ve compiled an up-to-date ruleset that uses the standard format and includes comments indicating each vendor. While not a terribly new contribution, I’ve decided to post the rules here to allow android devs and examiners the opportunity to use them with little effort.

Copy & paste it:

# 51-android-rules should be placed in /etc/udev/rules.d (chmod 664 or a+r)
# Official Guide & Vendor IDs: http://developer.android.com/tools/device.html#Acer
SUBSYTEM==”USB”, SYSFS{idVendor}==”502″, MODE=”0666″
#ASUS
SUBSYTEM==”USB”, SYSFS{idVendor}==”0b05″, MODE=”0666″
#Dell
SUBSYTEM==”USB”, SYSFS{idVendor}==”413c”, MODE=”0666″
#Foxconn
SUBSYTEM==”USB”, SYSFS{idVendor}==”0489″, MODE=”0666″
#Fujitsu
SUBSYTEM==”USB”, SYSFS{idVendor}==”04c5″, MODE=”0666″
#Fujitsu Toshiba
SUBSYTEM==”USB”, SYSFS{idVendor}==”04c5″, MODE=”0666″
#Garmin-Asus
SUBSYTEM==”USB”, SYSFS{idVendor}==”091e”, MODE=”0666″
#Google
SUBSYTEM==”USB”, SYSFS{idVendor}==”18d1″, MODE=”0666″
#Haier
SUBSYTEM==”USB”, SYSFS{idVendor}==”501E”, MODE=”0666″
#Hisense
SUBSYTEM==”USB”, SYSFS{idVendor}==”109b”, MODE=”0666″
#HTC
SUBSYTEM==”USB”, SYSFS{idVendor}==”0bb4″, MODE=”0666″
#Huawei
SUBSYTEM==”USB”, SYSFS{idVendor}==”12d1″, MODE=”0666″
#K-Touch
SUBSYTEM==”USB”, SYSFS{idVendor}==”24e3″, MODE=”0666″
#KT Tech
SUBSYTEM==”USB”, SYSFS{idVendor}==”2116″, MODE=”0666″
#Kyocera
SUBSYTEM==”USB”, SYSFS{idVendor}==”0482″, MODE=”0666″
#Lenovo
SUBSYTEM==”USB”, SYSFS{idVendor}==”17ef”, MODE=”0666″
#LG
SUBSYTEM==”USB”, SYSFS{idVendor}==”1004″, MODE=”0666″
#Motorola
SUBSYTEM==”USB”, SYSFS{idVendor}==”22b8″, MODE=”0666″
#MTK
SUBSYTEM==”USB”, SYSFS{idVendor}==”0e8d”, MODE=”0666″
#NEC
SUBSYTEM==”USB”, SYSFS{idVendor}==”0409″, MODE=”0666″
#Nook
SUBSYTEM==”USB”, SYSFS{idVendor}==”2080″, MODE=”0666″
#Nvidia
SUBSYTEM==”USB”, SYSFS{idVendor}==”0955″, MODE=”0666″
#OTGV
SUBSYTEM==”USB”, SYSFS{idVendor}==”2257″, MODE=”0666″
#Pantech
SUBSYTEM==”USB”, SYSFS{idVendor}==”10a9″, MODE=”0666″
#Pegatron
SUBSYTEM==”USB”, SYSFS{idVendor}==”1d4d”, MODE=”0666″
#Philips
SUBSYTEM==”USB”, SYSFS{idVendor}==”0471″, MODE=”0666″
#PMC-Sierra
SUBSYTEM==”USB”, SYSFS{idVendor}==”04da”, MODE=”0666″
#Qualcomm
SUBSYTEM==”USB”, SYSFS{idVendor}==”05c6″, MODE=”0666″
#SK Telesys
SUBSYTEM==”USB”, SYSFS{idVendor}==”1f53″, MODE=”0666″
#Samsung
SUBSYTEM==”USB”, SYSFS{idVendor}==”04e8″, MODE=”0666″
#Sharp
SUBSYTEM==”USB”, SYSFS{idVendor}==”04dd”, MODE=”0666″
#Sony
SUBSYTEM==”USB”, SYSFS{idVendor}==”054c”, MODE=”0666″
#Sony Ericsson
SUBSYTEM==”USB”, SYSFS{idVendor}==”0fce”, MODE=”0666″
#Teleepoch
SUBSYTEM==”USB”, SYSFS{idVendor}==”2340″, MODE=”0666″
#Toshiba
SUBSYTEM==”USB”, SYSFS{idVendor}==”0930″, MODE=”0666″
#ZTE
SUBSYTEM==”USB”, SYSFS{idVendor}==”12d2″, MODE=”0666″

Or you can download it from my Sourceforge @ https://sourceforge.net/projects/forensicscripts/files/android/

Edit: Do you see android running on a device that works but somehow isn’t officially mentioned in the SDK docs? Feel free to grab the vid and comment with it (to get the vid you can connect the device and run a simple dmesg | usb.)

Thoughts on viaExtract (Demo)

I recently had the opportunity to try the viaForensics viaExtract VM utility. viaExtract is essentially a framework in which many different advanced analysis features can be utilized (and automated). Based on Ubuntu, the VM utility is easy to setup and even easier to operate.

Although I’m not terribly advanced in mobile forensics (more of a hobby at the moment), I’ve used Santoku and acquired android data through AFLogical OSE. The law enforcement/government-only AFLogical proper is offered through viaExtract and enables the reporting and harvesting of many different types of data, including:

* Device Information
* Browser History including Searches & Bookmarks
* An in-depth call log
* In-depth contact information acquisition
* Thumbnailed photos each including their own hash
* Application installations
And more…

Much like using AFLogical OSE within Santoku, the analyst can easily deploy the ADB daemon onto the device and have the workstation connect to it so long as the android is set into debugging mode and the VM properly passes through the USB connection. The daemon essentially allows you to execute commands on the device and is packaged with the SDK (in case you haven’t had the pleasure of using ADB in the past). As with all viaForensics tools, there’s no digging around the Android SDK for ADB to manually deploy it. But in viaExtract there’s the added benefit of automated deployment of AFLogical OSE on the smartphone. In fact, the data collection process is fully automated and shouldn’t require the analyst to actually touch the mobile device at all.

Along those lines you don’t actually have to pull the acquired reports from the device’s SD card. All of that is also automated. But should you want to push any additional tools to the device, you can do so with the command line (via adb push).

Case management is one of viaExtract’s most important features. You can manage your entire case using viaExtract and include multiple devices for inspection.

Whereas in Santoku the reports output in CSV, viaExtract allows you to compile PDF-reports based on HTML reports it acquires. The feature is as simple as selecting the PDF option on the toolbar.

But what other advanced features does viaExtract have? While I can’t access them within the demo version, the tool offers the analyst the following additional options:

* Gesture Key Code (if used to lock a device)
* Image Storage Device (SD)
* Unlock Screen (Thomas Cannon mentioned in his Defcon speech how 4 digit pins are extremely easy to crack whereas using complex passphrases may not be as simple)
* Sleuth Kit Timeline exporting (allows for use in generating super timelines)
* Encryption Brute Force (makes use of file headers and footers akin to the bruteforce_stdcrypto Python script in Santoku, but fully automated and makes use of the viaExtract GUI)

Despite being limited to basic data acquisition with the demo version, I can already tell how valuable this tool can be when conducting forensic examinations. Automation, case management and advanced mobile forensic features rolled all into one easy-to-use package marks viaExtract as a good product for law enforcement personnel.

On AFLogical OSE and SD Card Limitations

While it’s beyond the scope of this post, when using AFLogical OSE in Santoku reports are saved to the device’s SD card and must be copied to the analyst’s workstation via the command line. But devices like the Razr Maxx HD only allow for pictures and video to be transferred to the SD card (this limit seems to coincide with the release of MTP with jelly bean). This limitation is imposed on many newer devices running android 4.2+. Upon some research into the matter, I believe this limitation does not  restrict AFLogical OSE reports from being saved to the card.

Santoku aside – and more to the point of using viaExtract with AFLogical-proper – vE worked flawlessly as advertised and automatically extracted the needed data for me, reporting on it with ease.

Type of device used: Unrooted Motorola Razr Maxx HD and a rooted Motorola Razr.

Note: I do not work for viaForensics, I was simply interested in this tool and decided to test it. The reason for the blog post is to help others make the decision to try it if they’re looking for a valuable android forensics tool.

Resources

viaExtract: https://viaforensics.com/products/viaextract/
AFLogical & AFL OSE: https://viaforensics.com/resources/tools/android-forensics-tool/
Santoku Linux: https://santoku-linux.com/